
In the race to woo potential customers, businesses today are exploring multiple channels to reach out to them. While multi-channel campaigns are no doubt popular, email marketing continues to remain one of the most preferred means of customer outreach.
An effective digital marketing channel, e-mail marketing must be scaled based on the audience. In order to do this, you need a system that can adapt and scale accordingly. You need an email marketing solution that can optimize your campaigns so that you reach the right audience in real time.
At Nvish, our experts deploy Marketo for marketing automation and lead engagement. Gartner recognized Marketo as a leader in CRM lead management eight years in a row. With Marketo
email campaigns, you can engage with customers 1:1 by personalizing your mails- all of this automatically, and at scale.
Marketo drip campaigns help you create smart strategies that will deliver optimal results by reaching the right people at the right time. Creating an email campaign using Marketo is both quick and simple. You start with visually appealing and responsive templates. Rich insights into customer preferences means that the right messaging goes out to the right person, and lands in their inbox for sure.
You can respond to customers in real time by setting up triggers based on customer activity. It is also possible to get accurate metrics on how your campaign is doing so that you can make changes, if needed.
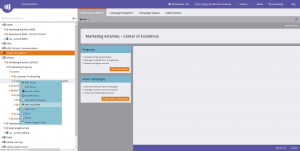
Here’s a step-by-step walkthrough on how to automate Marketo email campaigns.
1. First, navigate to Marketing Activities.
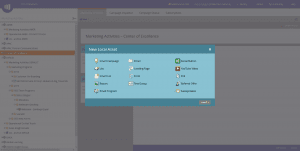
2. Select the program to which you want to add the email. Now, click on the New drop-down and choose New Local Asset.
3. Click on Email.
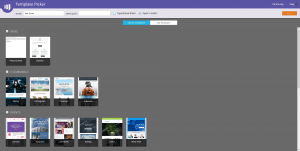
4. Assign a name to your email in the section on template picker, and add a description. After this, click on the template that you wish to use and then choose Create.
5. Give a subject line. A counter on the right will tell you if you are under the recommended 50-character limit.
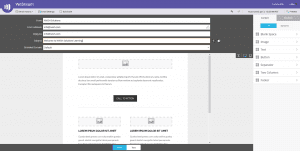
6. Now add the module required from UI selection area on the right. You can do this using the drag and drop function.
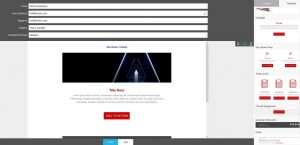
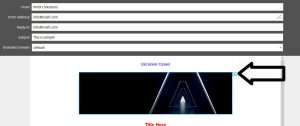
7. Now, either double click inside the module or on the gear sign on the top right corner. To edit the email content, select edit.
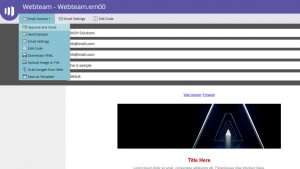
8. You will see the Email Actions menu on the top left corner of the screen. Select Approve from this menu and close option.
Contact us at https://www.nvish.com/contact-us.
Share:


 AI search agent
Add new comment